
Humble Acres is reader-supported. When you buy through links on our site, we may earn an affiliate commission at no extra cost to you — we only recommend products we’d use ourselves. See our affiliate disclosure.
The air plant starter kit
- 2 Pack 12 x 8 Inch 100% Natural Cork Perch, Bird Cork Seat Boards,… — cork bark or driftwood
- Yarlung 1/16 Inch x 500 Feet Wire Rope Cable, Stainless Steel Braided… — stainless or coated florist wire
- Mosaic Glue, 2 Pack 120ml Waterproof Adhesive for DIY Crafts –… — waterproof craft glue
- Mkono 3 Pack Air Plant Holder, Glass Hanging Planter Terrarium Globe… — open glass globes
- Organic Ready to Spray Air Plant Food – Fertilizer Mist for Weekly Use… — bromeliad fertilizer
Add all 5 to your Amazon cart →
Opens Amazon’s cart confirmation page — you review the list and prices there, and nothing is added until you approve it. Prefer to pick and choose? Every item above links to its own product page.
Planting air plants is the one job in indoor gardening where the instruction is: don’t plant them. No pot, no potting mix, no burying the base — a tillandsia set into soil is a tillandsia on a countdown. What you’re really doing is mounting: perching the plant on wood, stone, shell, or glass so it sits the way it would in the wild, high and dry and airy. I learned this the expensive way, with a nursery six-pack and a bag of potting mix, and every one of them rotted from the crown down within two months. Here’s how to mount, glue, wire, and display air plants so they last for years instead of weeks.
The Short Answer: You Mount Them, You Don’t Bury Them
Air plants grow and reproduce without any soil whatsoever. Iowa State University Extension puts it plainly: because they need no growing medium, they can live just about anywhere indoors with bright, indirect light — set in trays, hung in specialized holders, tucked into seashells, glass globes, vases, or shallow dishes. The display is limited mostly by your imagination.
The reason is anatomical. Clemson’s Home & Garden Information Center explains that Tillandsia species use their root systems only for attachment — they’re epiphytes, gripping trees and rocks without taking anything from them. Every drop of water and every nutrient enters through small scales on the leaves. The roots are a climbing harness, not a feeding tube. So when we talk about planting air plants, we’re really talking about anchoring them somewhere they can grip, drink, and dry out.
Why Soil Is a Death Sentence
Bury an air plant’s base in potting mix and you create exactly the condition it evolved to avoid: constant moisture held against the crown, where the leaves meet. Rot starts there and it moves fast. Clemson’s single most important display instruction is that whatever material you mount on, be sure it does not hold water — and potting soil is the most water-holding material in the house.
Iowa State makes the same point from the watering side: after a soak, you shake the plant out and set it upside down precisely so no water lingers in the leaf axils. Every good mount is designed around that drainage. If your display traps a puddle at the base, it doesn’t matter how bright the window is. For the full care picture beyond mounting, our care of airplants guide covers the routine week to week.
Know What You’re Mounting: Tillandsia in Brief
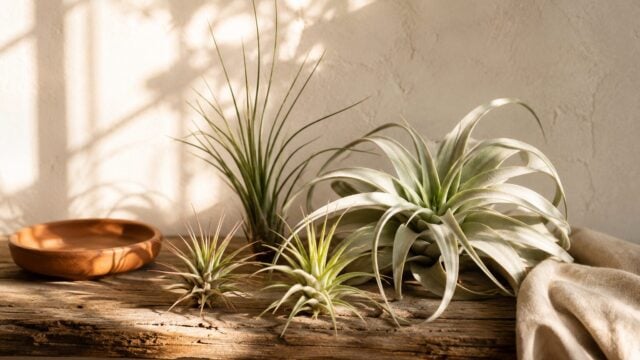
Air plants belong to the genus Tillandsia, part of the bromeliad family, native to tropical and subtropical regions of North and South America. In the wild, Iowa State notes, they cling to trunks, branches, rocks, and anything else that will hold them — including telephone wires. The genus spans the familiar Spanish moss (T. usneoides) draping southeastern trees, ball moss (T. recurvata), and the showy species most of us buy: T. ionantha, T. xerographica, T. capitata, and T. bulbosa.
Clemson counts over 500 species available in the trade, with an important caveat: in many areas native populations are endangered by over-collection, so buy only nursery-propagated plants. Reputable growers and Etsy’s specialist tillandsia shops will tell you outright that their stock is nursery-grown; if a listing is coy about it, shop elsewhere. Mature specimens like a big xerographica are worth sourcing from a dedicated grower rather than a bargain multipack.
Surfaces That Work — and the One That Doesn’t
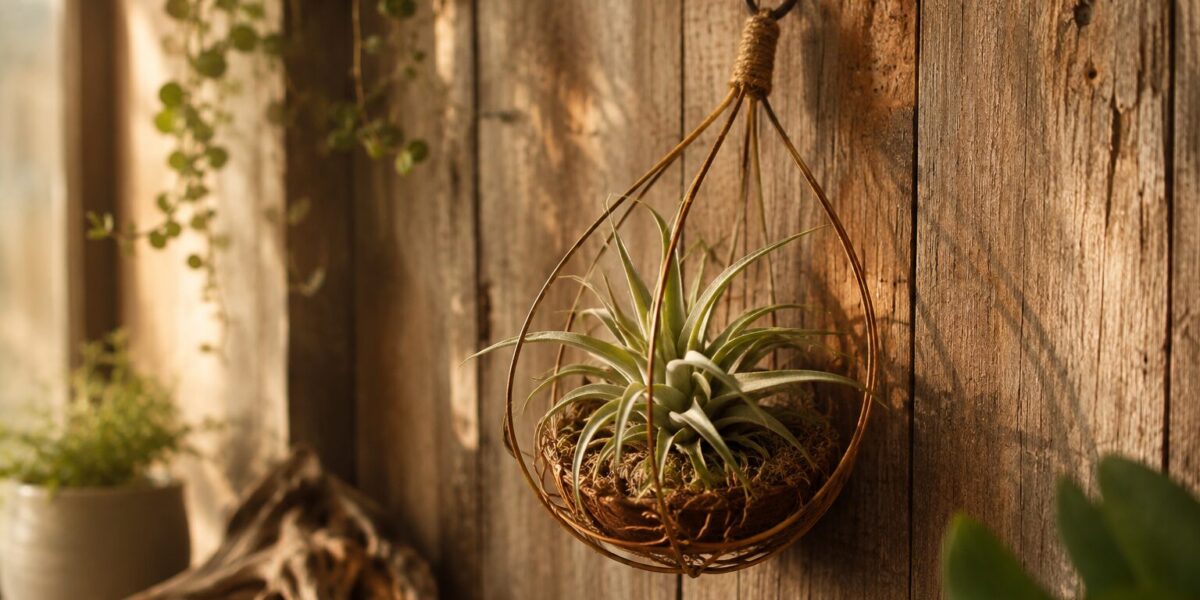
Clemson’s list of proven mounting surfaces is refreshingly broad: bark, shells, rocks, shallow dishes, glass globes, and purpose-built plant stands, plus hanging arrangements on fishing line or thin wire. What unites them all is that they shed water rather than store it.
- Cork bark — the mounter’s favorite. Naturally water-resistant, textured enough for roots to grab, and light enough to hang on a wall.
- Driftwood and grapewood — sculptural, sturdy, and dries fast. A single gnarled branch can hold a dozen plants at different angles.
- Stone and lava rock — heavy, stable, and porous enough to grip. Ideal for tabletop pieces.
- Shells — the classic seaside display; just make sure the plant sits so the shell can’t cup water underneath.
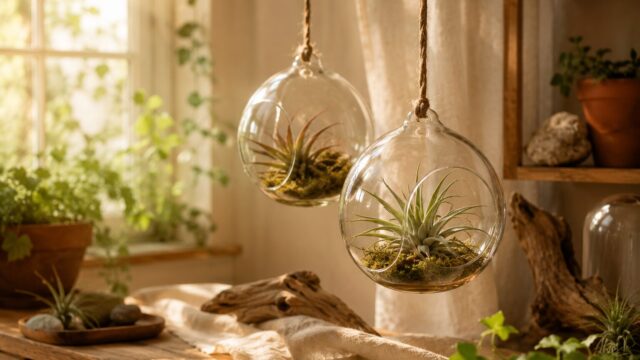
- Glass globes and stands — beautiful, but treat them as holders, not habitats. Take the plant out to soak.
The surface to avoid is soft, absorbent, untreated wood that stays damp — and in fully sealed containers, wood of any kind. Enclosed humid environments break wood down quickly and invite fungus, which is why a closed terrarium is a poor permanent home for a tillandsia even though open glass displays are fine. Airflow is not optional: Clemson lists good air circulation alongside light and water as a core requirement, because it’s what lets the plant dry between drinks. A piece of cork bark or driftwood is the easiest starting canvas.
Attachment Methods, Ranked
There are four ways to fix a plant to its mount, and the right choice depends mostly on how you plan to water.
1. No fastener at all. Wedge the plant into a crevice, a knothole, or a shell where friction alone holds it. Zero risk, fully removable, and over months the roots often grip on their own. This is where I’d start.
2. Thin wire. Clemson explicitly endorses hanging tillandsias on thin wire, and wire has the great virtue of being reversible — unwind it, soak the plant, put it back. One hard rule: never copper. Copper is toxic to air plants and will kill them, so use stainless or coated florist wire instead.
3. Fishing line. Also Clemson-approved, and nearly invisible — perfect for hanging plants from a ceiling, rod, or branch when you don’t want the hardware to show.
4. Waterproof adhesive. A dot of waterproof craft glue makes a permanent bond for wall art and mounted displays. It works, but understand the trade: a glued plant can never be removed for soaking, so you’re committing to watering it in place. Never use hot glue, which cooks tissue on contact, and never glue the leaves — only the very base and roots.
How to Mount an Air Plant, Step by Step
The whole job takes about ten minutes per plant, and the sequence matters more than the materials. Think of planting air plants as five small decisions rather than one craft project.
Step 1 — Soak and dry the plant first. Give it a full drink before mounting, following Iowa State’s method: submerge 30 to 60 minutes, shake it out well, then set it upside down for anywhere from 30 minutes to three hours until it’s completely dry. Mounting a wet plant traps moisture at exactly the point you’re about to fasten.
Step 2 — Find its front and its lean. Hold the plant against the mount and turn it until the leaves fall naturally. Angle it so the crown tips slightly downward or sideways rather than facing straight up — that single choice is what lets water run out instead of pooling in the center.
Step 3 — Fasten at the base only. If you’re wiring, wrap around the hard base just above the roots, snug but not biting, and never around the leaves. If you’re gluing, apply a small dot to the roots and base, press, and let it cure fully — usually overnight — before the plant gets anywhere near water.
Step 4 — Leave the crown open. Nothing should cover, cup, or crowd the center of the plant. No moss packed around the base, no decorative pebbles heaped over it. That open, breezy center is the whole design goal.
Step 5 — Give it two weeks. Watch for browning at the contact point or water lingering after a soak; either means the mount angle needs adjusting. A plant that’s happy after a fortnight is settled for good, and its roots will slowly grip the surface on their own.
Watering After Planting Air Plants
Mounting changes how you water, so this is where new displays live or die. Start with the fact that surprises most beginners — Iowa State is emphatic that spraying or misting on a regular basis does not provide enough moisture to keep these plants healthy. Misting alone is why so many gift-shop globes end up crispy.
The extension method is a soak: submerge the plant in room-temperature water for 30 to 60 minutes, shake it out gently to clear water from between the leaves, then rest it upside down for 30 minutes to three hours to dry thoroughly before returning it to its spot. Clemson’s version is similar — once a week, submerged 20 to 30 minutes, turned upside down to drain. One detail worth adopting: let your water sit out overnight first. Iowa State notes this brings it to room temperature and lets chlorine dissipate, which prevents the brown leaf tips that otherwise puzzle people.
Frequency shifts with the season and the spot. Iowa State’s guideline is weekly in warm, bright conditions and every two weeks in cooler, darker ones. For permanently glued mounts that can’t be removed, dunk the entire mount in a basin or drench it thoroughly at the sink, then tip it to drain and let it dry in moving air — a fan in the room for an hour is cheap insurance. Whatever your method, Clemson’s warning stands: excess water collecting at the center is what rots air plants, and gentle shaking plus upside-down drying is the fix.
Light and Placement for a Mounted Display
A mount is only as good as its location. Clemson specifies bright, filtered light on an eastern, southern, or western exposure — never direct sunlight — while Iowa State frames it simply as bright, indirect light anywhere indoors. In practice that means near a window but out of the beam, which conveniently is also where you can see and enjoy the display.
Air circulation deserves equal billing. A wall-mounted piece of driftwood in a bright hallway is nearly ideal; a sealed apothecary jar in the same spot is not, because the plant can never dry. If your intended display corner is dim, plan on supplemental lighting rather than hoping — our guide to how much light air plants need works through window exposures and grow light setups in detail.
Display Ideas Worth Building
Once you internalize the two rules of planting air plants — nothing holds water, everything gets air — the creative field opens up. These all have extension backing or long grower use behind them:
- Driftwood wall mount: a single branch anchored to the wall with three to five plants of varying size and texture. The gallery piece of the air plant world.
- Hanging globes: open glass globes on fishing line at staggered heights, which Clemson pictures as one of the classic displays. Choose open-sided globes over nearly closed ones.
- Shell and stone bowl: a shallow dish of shells, lava rock, and tillandsias as a table centerpiece — nothing glued, everything liftable for soaking.
- Cork bark plaque: a flat piece of cork mounted like a picture, plants wired on. Light enough for a command hook.
- Branch chandelier: a horizontal branch suspended by cord with plants hung along it, drifting in the room’s air currents.
My own bias after years of this: build removable displays first. The wired and wedged pieces are the ones I still enjoy, because watering them takes a basin and five minutes rather than a plan.
Feeding, Flowering, and Pups
Fertilizer isn’t required, but it earns its keep. Iowa State suggests a balanced all-purpose fertilizer at half or quarter strength added to the water every third or fourth watering. Clemson recommends a monthly feed with a bromeliad fertilizer diluted to one-fourth the label rate, always followed by good draining.
Feeding and bright light together are what push a plant toward bloom. Clemson notes flowers are usually under two inches and appear in late winter and mid-summer; Iowa State adds that they arrive in vivid pinks, purples, and reds from the center of the plant. Then comes the bittersweet part of bromeliad life: the mother plant dies after flowering, but produces offsets — “pups” — around her base. Gently separate them once they’re a third of her size and you have new plants to mount, which is how one gift-shop tillandsia becomes a wall full of them.
Taking Displays Outdoors for Summer
Air plants grow best outdoors in warm months, and mounted displays travel well. Iowa State’s schedule for a cold-winter climate: move plants out after all frost danger has passed — mid-May in Iowa — into a bright but shaded location, or part shade with protection from late-day sun. Water and fertilize as you do indoors, unless natural rain and humidity are keeping them plump and green on their own. Bring them back in before nights approach freezing, typically mid-to-late September in that same climate; adjust both dates to your own region.
Troubleshooting a New Mount
Most mounting failures announce themselves clearly if you know the vocabulary. Clemson’s list of underwatering signs is precise: leaves curl or roll inward, the foliage turns a dull color, and tips brown. Brown tips alone, with otherwise healthy color, more often point to chlorine in tap water — the overnight sit fixes it.
The failure specific to mounting is rot, and it looks like a plant that pulls apart at the base or turns dark and soft at the center. That’s water that never left the crown, and the cure is prevention: change the mount angle, shorten the drying position, and improve airflow. If a plant’s inner leaves slide out at a tug, that one is gone — but check its neighbors’ angles before you mount replacements. Anything that persists beyond these basics is usually a light or watering-rhythm issue, and our broader plant care library digs into diagnosis.
Pet Safety and the Hardware Question
Good news for pet households: the ASPCA’s toxic and non-toxic plant database lists Tillandsia as non-toxic to both cats and dogs. The plant itself is not the hazard — the mount is. Loose wire ends, cured glue chips, small decorative pebbles, and fishing line are all things a curious pet can swallow. Trim wire flush, tuck the ends under the plant, and hang displays where a determined cat can’t bat them down.
Planting Air Plants FAQ
Can I put an air plant in soil at all? No. The roots only anchor; soil holds moisture against the base and causes rot.
Do air plants need pots? Never as growing containers. A pot can hold one as decor, but the plant should sit on top, dry and open, not down in a medium.
Can they live sealed in a jar? Not long term. Clemson names air circulation as a requirement — enclosed containers keep the plant wet and invite disease.
How do I remove a glued plant? You largely can’t without damaging it, which is the argument for wiring or wedging until you’re sure of a design.
How long until roots grip the mount? Often a few months in good conditions — and once they do, the plant is anchored better than any wire you could wrap. Browse more tillandsia guides in our air plants collection.
The air plant starter kit
- 2 Pack 12 x 8 Inch 100% Natural Cork Perch, Bird Cork Seat Boards,… — cork bark or driftwood
- Yarlung 1/16 Inch x 500 Feet Wire Rope Cable, Stainless Steel Braided… — stainless or coated florist wire
- Mosaic Glue, 2 Pack 120ml Waterproof Adhesive for DIY Crafts –… — waterproof craft glue
- Mkono 3 Pack Air Plant Holder, Glass Hanging Planter Terrarium Globe… — open glass globes
- Organic Ready to Spray Air Plant Food – Fertilizer Mist for Weekly Use… — bromeliad fertilizer
Add all 5 to your Amazon cart →
Opens Amazon’s cart confirmation page — you review the list and prices there, and nothing is added until you approve it. Prefer to pick and choose? Every item above links to its own product page.
Leave a Reply